Vacuum casting is a manufacturing technique that is gaining popularity, especially in the field of small-batch printing. This method offers an efficient and cost-effective alternative to traditional manufacturing processes, allowing high-quality parts to be produced with high precision. In this article, we’ll explore the basics of vacuum casting, its benefits, and how it can be applied to low-volume printing like we do at Axis.
What is Vacuum Casting?
Vacuum casting is a casting process that uses a vacuum to pull liquid material into a mold. This process is especially useful for materials that require high precision and a flawless surface finish. The vacuum removes air bubbles and inclusions, resulting in consistent, defect-free parts.
The Steps of the Vacuum Casting Process
-
Creation of the Master Model : The process begins with the creation of a master model, often made in 3D printing. This model serves as the basis for the manufacture of the silicone mold.
-
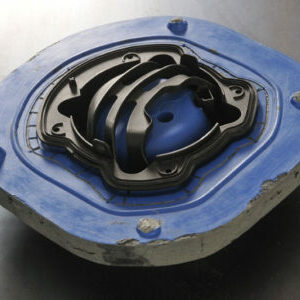
Silicone Mold Making : The master model is then encapsulated in liquid silicone, which hardens to form a flexible and durable mold. This mold can be used multiple times to produce identical parts.
-
Material Preparation : The casting material, often a polyurethane resin, is prepared and degassed to remove air bubbles.
-
Vacuum Casting : The prepared material is poured into the vacuum mold, ensuring even distribution and no air bubbles.
-
Demolding and Finishing : Once the material has cured, the part is demolded and may require additional finishes, such as sanding or painting.
For the dimensions of your parts, we are able to comply with the standard NFT 58-000 normal class.
Advantages of Vacuum Casting for Small Series Printing
-
Precision and Detail : Vacuum casting allows fine and complex details to be reproduced, which is essential for prototypes and small production runs.
-
Material Flexibility : A wide range of materials can be used, including rigid, flexible, transparent or colored resins, thus offering great flexibility in terms of mechanical and aesthetic properties.
-
Cost-Effectiveness : Compared to other manufacturing methods, vacuum casting is relatively inexpensive, especially for small batches. Silicone molds are cheaper to produce and can be reused multiple times.
-
Speed of Production : The vacuum casting process is fast, allowing you to go from design to production in just a few days.
Applications of Vacuum Casting
Vacuum casting is used in a variety of industries, including:
- Rapid Prototyping : Ideal for creating functional and aesthetic prototypes.
- Small Batch Production : Perfect for small production runs where quality and accuracy are crucial.
- Automotive Industry : Used to produce custom spare parts and components.
- Electronics : Used to manufacture custom electronic enclosures and components.
Vacuum casting is a versatile and efficient manufacturing technique that is particularly suitable for small-batch printing. It offers a unique combination of precision and flexibility, making it a solution of choice for many industrial sectors. By adopting this method, companies can improve their ability to produce high-quality parts quickly and cost-effectively. At Axis, we use vacuum casting for series of up to 500 parts (a mold can make about twenty castings: quantity varies according to the complexity of the part and the material used). If you have a project, do not hesitate to contact our experts to find out more.